

How To Change Cartridge In Canon Pixma Printer

Changing the ink cartridge in a Canon Pixma printer is a simple process that helps maintain print quality and keeps your printer working smoothly. Over time, ink cartridges run out or dry up, and replacing them ensures your documents and photos continue printing clearly. Whether you are using a Canon Pixma for home or office printing, following the correct steps prevents damage and ensures the new cartridge is properly installed.
- Turn On the Printer
Before replacing the cartridge, make sure the printer is switched on. Press the Power button to turn it on if it’s off. The printer needs to be powered so that the ink carriage can move into position. Avoid replacing the cartridge while the printer is off, as this may cause alignment errors.
- Open the Front Cover or Paper Output Tray
Next, open the printer’s front cover or paper output tray, depending on your Canon Pixma model. Inside, you will see the cartridge holder move automatically to the replacement position. Wait until the cartridge holder stops moving before continuing. Forcing it to move could damage the printer.
- Remove the Empty Cartridge
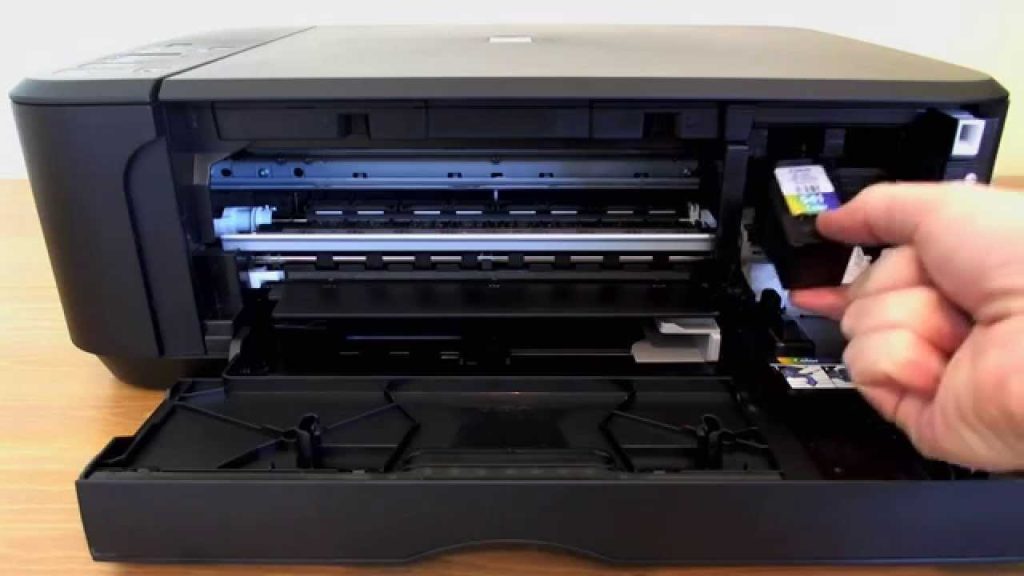
Locate the empty cartridge that needs replacing. Press down gently on the front of the cartridge to release it. The cartridge will click out of place, allowing you to lift it out carefully. Avoid touching the metal contacts or nozzles to prevent ink blockage or electrical issues.
- Prepare the New Cartridge
Take the new cartridge out of its packaging. Remove the protective tape or plastic seal covering the ink nozzle and electrical contacts. Be careful not to touch these parts with your fingers. Holding the cartridge by its sides helps prevent damage and keeps it clean.
- Insert the New Cartridge
Insert the new cartridge into the empty slot. Make sure you match the cartridge color with the correct slot — black in the “B” slot and color in the “C” slot. Push the cartridge in gently until it clicks securely into place. The click indicates that the cartridge is properly locked in position.
- Close the Printer Cover
Once the new cartridge is installed, close the printer’s front cover or paper output tray. The printer will automatically start an initialization process, which allows it to detect the new cartridge. Wait until the printer stops making noise before trying to print.
- Align the Print Head and Test
After installation, it’s a good idea to align the print head for the best print quality. On your computer, open the printer software, go to Maintenance or Printer Settings, and select Align Print Head. You can also print a test page to check that the new cartridge is working properly and that the colors appear clearly.
Also Read: How To Celebrate Women’s Day