

How To Draw Elsa

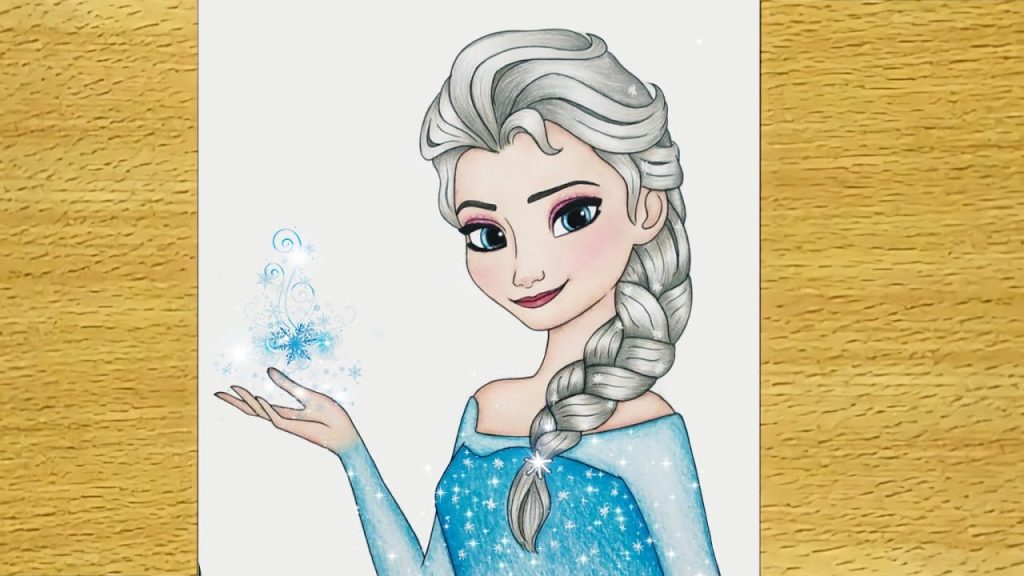
Drawing Elsa is a wonderful way to practice drawing elegant characters with soft facial features, flowing hair and graceful clothing. Elsa, from Disney’s Frozen, is known for her calm expression, long braid and beautiful ice-inspired dress. While she may look detailed at first, Elsa becomes much easier to draw when you break her into simple shapes and build the details step by step. By focusing on proportions, gentle lines and smooth shading, you can create a lovely Elsa drawing that looks neat and recognizable. This guide explains how to draw Elsa in an easy and clear way.
- Start with the Head and Guidelines
Begin by drawing the basic head shape.
- Draw an oval shape for the head.
- Add a vertical line down the center of the face.
- Draw a horizontal line slightly below the center for the eyes.
- Keep all lines light and clean.
These guidelines help place the facial features correctly.
- Draw the Eyes and Eyebrows
Elsa’s eyes are large and expressive.
- Draw two large almond-shaped eyes along the eye line.
- Add curved upper lashes to make the eyes stand out.
- Draw small circles inside for pupils and highlights.
- Add thin curved eyebrows above the eyes.
Soft, gentle eyes give Elsa her calm and kind expression.
- Add the Nose and Mouth
Elsa’s facial features are delicate.
- Draw a small curved line for the nose.
- Place it halfway between the eyes and chin.
- Draw a small curved line for the mouth.
- Keep the smile subtle and relaxed.
Avoid heavy lines so the face stays soft and feminine.
- Shape the Face and Jawline
Now refine the head shape.
- Narrow the face slightly toward the chin.
- Draw a soft pointed chin.
- Smooth out the cheeks.
- Erase extra guidelines once satisfied.
A gentle jawline helps match Elsa’s elegant look.
- Draw Elsa’s Hair and Braid
Elsa’s hair is one of her most recognizable features.
- Draw a side part starting from the forehead.
- Sketch smooth curved lines flowing backward.
- Draw the braid over one shoulder using oval segments.
- Keep the braid loose and flowing.
Use long, smooth lines to show soft, silky hair.
- Draw the Neck and Upper Body
Next, move on to the body.
- Draw a long slender neck below the head.
- Add sloping shoulders on each side.
- Draw a simple upper torso shape.
- Keep the posture straight and graceful.
Elsa’s body should look light and elegant.
- Draw the Dress and Cape
Elsa’s dress adds beauty and detail.
- Draw the neckline of the dress across the shoulders.
- Sketch the fitted bodice.
- Draw the skirt flowing downward with long curved lines.
- Add the sheer cape flowing behind her.
Flowing lines help show movement and softness in the fabric.
- Add Hands and Arms
Keep the arms simple and relaxed.
- Draw thin arms extending from the shoulders.
- Bend the arms slightly for a natural pose.
- Draw small simple hands with minimal detail.
- Avoid stiff or straight lines.
Simple hands keep the drawing clean and balanced.
- Add Dress Details and Snowflake Designs
Details bring Elsa’s outfit to life.
- Draw small snowflake patterns on the dress.
- Add light decorative lines along the bodice.
- Keep patterns neat and evenly spaced.
- Avoid overloading the dress with details.
Simple designs maintain elegance.
- Add Shading and Highlights
Shading gives depth and polish.
- Shade lightly under the hair and chin.
- Add soft shading along the sides of the dress.
- Leave lighter areas for highlights.
- Keep shading smooth and gentle.
Soft shading suits Elsa’s icy and magical style.
- Finalize with Clean Lines
Complete your drawing by refining everything.
- Darken final outlines carefully.
- Erase all unnecessary sketch lines.
- Check proportions and posture.
- Smooth out shading and details.
Also Read: How To Draw Anime Hair