

How to Install a Gate Motor Safely and Correctly

Learning how to install a gate motor can improve security, convenience, and property value. Gate motors allow you to open and close your gate automatically using a remote control, keypad, or mobile app, eliminating the need for manual operation. While professional installation is recommended for complex setups, many standard gate motors can be installed successfully with careful planning and attention to safety.
This article explains the tools required, preparation steps, and the correct process for installing a gate motor properly.
-
Types of Gate Motors
Choosing the right motor is essential before installation.
Common gate motor types include:
- Sliding gate motors
- Swing gate motors
- Underground gate motors
- Solar-powered gate motors
Each type is designed for specific gate styles and weights.
-
Check Gate Condition Before Installation
A gate motor works best on a properly functioning gate.
Before installing:
- Ensure the gate opens and closes smoothly
- Check that hinges or rails are in good condition
- Confirm the gate is level and aligned
- Repair any damage or resistance
A faulty gate can damage the motor.
-
Gather Tools and Materials Needed
Having all tools ready makes installation easier.
You will typically need:
- Gate motor kit
- Mounting brackets
- Measuring tape
- Drill and drill bits
- Spanners and screwdrivers
- Spirit level
- Electrical cables
- Concrete and mounting base
- Safety gloves and goggles
Always read the manufacturer’s manual first.
-
Install the Gate Motor Base or Bracket
The motor must be firmly mounted.
Installation steps include:
- Mark the mounting position
- Prepare a concrete base if required
- Ensure correct height and alignment
- Allow concrete to cure fully before mounting the motor
A stable base prevents vibration and misalignment.
-
Mount the Gate Motor Unit
Correct positioning ensures smooth operation.
To mount the motor:
- Secure the motor to the base or bracket
- Align it with the gate movement path
- Tighten bolts firmly
- Confirm the motor is level
Incorrect alignment causes strain on the motor.
-
Install the Gate Rack or Arms
The motor must connect properly to the gate.
For sliding gates:
- Attach the rack along the gate frame
- Ensure even spacing
- Test movement manually
For swing gates:
- Install motor arms according to measurements
- Ensure correct opening angle
- Test movement without power
Precise alignment ensures smooth opening and closing.
-
Connect Electrical Wiring Safely
Electrical connections must be done carefully.
Key wiring steps include:
- Connect power supply cables
- Install backup battery if included
- Connect limit switches
- Ensure proper grounding
Turn off power during installation to prevent accidents.
-
Install Safety Features and Accessories
Safety devices protect users and property.
Common accessories include:
- Infrared safety beams
- Emergency release key
- Warning lights
- Keypads or intercom systems
Safety features are essential for compliance and protection.
-
Program the Gate Motor
Programming allows proper motor operation.
Programming steps may include:
- Setting opening and closing limits
- Adjusting speed and force
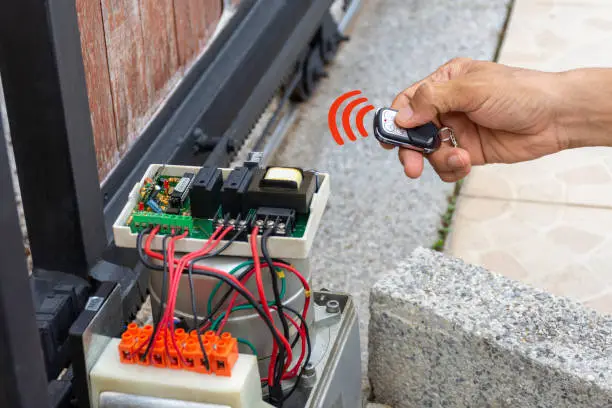
- Pairing remote controls
- Testing automatic closing functions
Follow manufacturer instructions carefully.
-
Test the Gate Motor Thoroughly
Testing ensures reliable performance.
Test the following:
- Smooth opening and closing
- Emergency manual release
- Safety beam response
- Remote control range
- Auto-close function
Make adjustments as needed before regular use.
-
Maintain the Gate Motor Regularly
Maintenance extends motor lifespan.
Basic maintenance includes:
- Cleaning dirt and debris
- Lubricating moving parts
- Checking bolts and brackets
- Testing safety features
- Replacing batteries when needed
Routine care prevents costly repairs.
Also Read: How to Insert a Footer in Excel Easily and Correctly