

How to Make a Suspension Bridge

How to make a suspension bridge is a fascinating topic for students, hobbyists, and anyone interested in engineering or school science projects. A suspension bridge is a structure where the deck is supported by cables that hang from tall towers. This design allows the bridge to span long distances while remaining strong and flexible. Whether you are building a small model for a project or learning the basic principles of bridge construction, understanding how a suspension bridge works will help you create a stable and realistic structure.
-
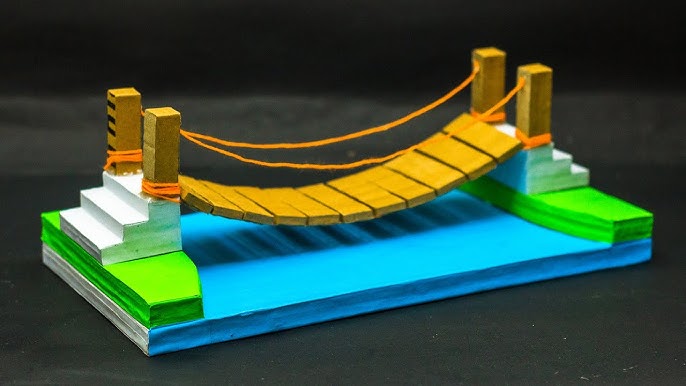
Understand how a suspension bridge works
Before building, it is important to know the basic structure. A suspension bridge has:
- Towers that hold up the main cables
- Main cables that carry the load
- Vertical suspenders that connect cables to the deck
- A deck where vehicles or pedestrians pass
The weight of the bridge and traffic is transferred through the cables to the towers and then to the ground.
-
Gather the necessary materials
If you are making a model suspension bridge for a school project, you can use simple materials such as:
- Cardboard or wooden board for the base
- String or strong thread for cables
- Straws or sticks for towers
- Glue or tape
- Scissors and ruler
Choose materials that are lightweight but strong enough to hold the structure together.
-
Build a strong base
Start by creating a firm base that will support the bridge. Cut a piece of cardboard or wood as the foundation. Make sure it is flat and stable to prevent the model from tipping over.
-
Construct the towers
The towers are vertical supports that hold the main cables. To build them:
- Use strong straws, sticks, or folded cardboard
- Attach them firmly to the base
- Ensure they are equal in height
The towers must stand straight and secure.
-
Attach the main cables
The main cables run from one end of the bridge to the other, passing over the towers. When attaching the cables:
- Stretch the string tightly
- Secure it firmly at both ends of the base
- Let it curve slightly between the towers
The curved shape helps distribute weight properly.
-
Add vertical suspenders
Cut smaller pieces of string to act as vertical suspenders. Attach them:
- From the main cable
- Down to the bridge deck
- At equal intervals
These suspenders transfer weight from the deck to the main cables.
-
Create the bridge deck
The deck is the flat part where vehicles or people would travel. You can:
- Cut a strip of cardboard
- Reinforce it with extra layers
- Attach it to the vertical suspenders
Make sure it is balanced and level.
-
Strengthen and test the structure
Once assembled, check all connections. You should:
- Reinforce weak joints with glue
- Ensure cables are tight
- Test the bridge by placing small weights on it
This helps confirm the structure is stable.
-
Add finishing details
For presentation, you may decorate your model by:
- Painting the towers
- Adding small toy cars
- Labeling different parts
This improves appearance and educational value.
Also Read: How to Make a Robot With a Box