

How to Remove Tile Floor

Removing a tile floor can seem like a difficult task, but with the right tools and approach, it becomes manageable even for beginners. Whether you are renovating your home or replacing damaged tiles, knowing how to remove tile floor properly helps you avoid unnecessary damage and prepare the surface for new flooring. With patience and careful handling, you can complete the process safely and effectively.
-
Prepare the Area and Gather Tools
Before starting, clear the room completely by removing furniture and any obstacles. This gives you enough space to work comfortably.
Gather the necessary tools such as a hammer, chisel, pry bar, and protective gear like gloves and safety glasses.
- Remove all furniture and items
- Wear protective gear
- Keep tools within reach
-
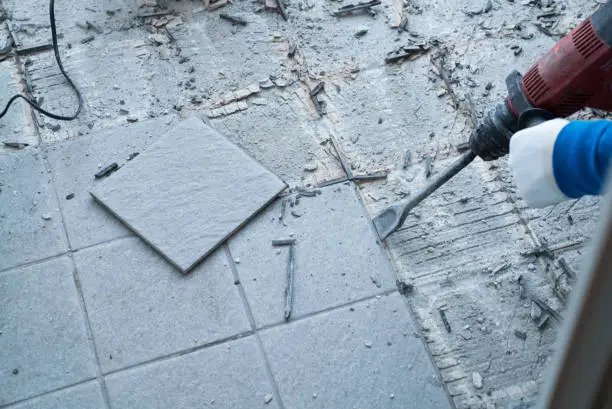
Break the First Tile
To begin, you need to break one tile to create an entry point. Use a hammer and chisel to crack the tile, starting from the center.
Once the first tile is broken, it becomes easier to remove the surrounding tiles.
- Strike the tile firmly but carefully
- Start from the center
- Remove loose pieces
-
Remove the Remaining Tiles
After creating an opening, use a chisel or pry bar to lift and remove the remaining tiles.
Work in small sections and continue until all tiles are removed from the floor.
- Work gradually across the floor
- Use controlled force
- Be patient with stubborn tiles
-
Remove Adhesive or Mortar
Once the tiles are gone, you will likely have adhesive or mortar left on the surface. Use a scraper or chisel to remove it.
This step is important to create a smooth and even surface for new flooring.
- Scrape off all remaining residue
- Smooth out uneven areas
- Take your time for better results
-
Clean and Prepare the Surface
After removing the tiles and adhesive, sweep and clean the floor thoroughly. Make sure the surface is dry and level before installing new flooring.
You can make repairs if needed to ensure a solid base.
- Remove dust and debris
- Check for damage
- Ensure the surface is level and clean
Also Read: How to Remove Password from iPhone