

How to Rip Jeans

Ripped jeans are a popular fashion trend that adds a stylish, casual, and edgy look to your outfit. Instead of buying pre-ripped jeans, you can easily create your own at home and customize them to match your personal style. Learning how to rip jeans allows you to control the design, placement, and level of distress. With a few simple tools and careful steps, you can achieve a trendy look without spending much money.
-
Choose the Right Pair of Jeans
Start by selecting a pair of jeans that you want to customize. Older jeans or slightly worn ones often work best because they are easier to distress.
Avoid very stretchy or thin fabric, as it may tear too easily.
- Pick comfortable jeans
- Choose a good fit
- Avoid overly delicate fabric
-
Mark the Areas to Rip
Wear the jeans and use chalk or a pen to mark where you want the rips. Common areas include the knees, thighs, or pockets.
Marking helps you avoid placing rips in the wrong spots.
- Stand naturally while marking
- Focus on natural stress areas
- Keep spacing balanced
-
Cut Small Slits First
Use scissors or a razor blade to make small horizontal cuts where you marked.
Start with small cuts because you can always make them bigger later.
- Use sharp tools carefully
- Cut slowly and precisely
- Avoid making large cuts at once
-
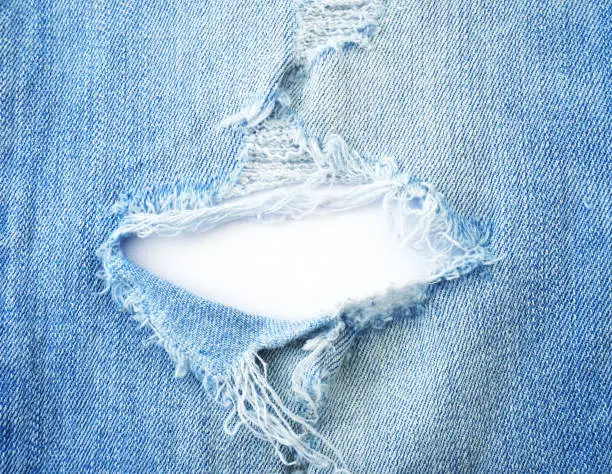
Create the Distressed Look
Use tweezers, a knife, or sandpaper to pull out threads and roughen the edges around the cuts.
This gives your jeans a natural worn-out appearance.
- Pull out a few threads at a time
- Focus on white horizontal threads
- Use sandpaper for a faded effect
-
Wash and Style the Jeans
After creating the rips, wash the jeans to enhance the distressed look. The washing process loosens the threads and softens the fabric.
Try them on and make any final adjustments if needed.
- Wash once after ripping
- Let them air dry
- Add more distressing if desired
Also Read: How to Reverse an FNB eWallet