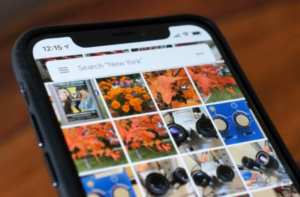
Google Photos is a powerful platform for storing and organizing your photos and videos. Whether you want to back up cherished memories or free up space on your device, saving photos on Google is a convenient and secure option. Here’s a step-by-step guide on how to save photos on Google.
Using Google Photos on Mobile
-
Install Google Photos
- If you haven’t already, download the Google Photos app from your device’s app store (available for both Android and iOS).
-
Sign In or Create an Account
- Open the app and sign in with your Google account. If you don’t have one, you can create a Google account for free.
-
Set Up Backup and Sync
- After signing in, you’ll be prompted to set up “Backup and Sync.” This feature automatically uploads your device’s photos and videos to your Google Photos account.
- Follow the on-screen instructions to enable it. You can choose to back up photos in “High quality” (slightly compressed) or “Original quality” (full resolution, but it may count against your Google Drive storage).

-
Select Photos to Save
- To save photos already on your device, open Google Photos and tap the “+” sign or the “Library” tab.
- Select “Photos on device” or a similar option depending on your device.
- Choose the photos you want to save by tapping them.
-
Tap the Backup Button
- Once you’ve selected the photos, tap the cloud-shaped “Backup” button. This will upload the chosen photos to your Google Photos account.
-
Access Your Saved Photos
- To view your saved photos, simply open the Google Photos app and navigate to the “Photos” tab. You’ll find all your backed-up photos there.
Using Google Photos on Computer
-
Open Google Photos
- Visit the Google Photos website (photos.google.com) and sign in with your Google account.
-
Upload Photos
- Click the “Upload” button, usually located in the top-right corner.
- Select “Computer” to upload photos from your PC or Mac.
-
Choose Photos to Upload
- A file dialog will appear. Browse your computer to find and select the photos you want to upload.
-
Start the Upload
- Click “Open” or “Start upload” (depending on your device). Google Photos will begin uploading your selected photos.
-
Access Your Saved Photos
- Once the upload is complete, you can access your photos by going to the “Photos” tab on the Google Photos website.
Organizing Your Photos
- Google Photos allows you to create albums, add descriptions, and organize your photos and videos effectively. You can also use the search function to find specific images by entering keywords.
Privacy and Sharing
- Google Photos offers various privacy settings and sharing options. You can control who can see your photos and videos and even share them with specific contacts.
Note: Ensure that you have a stable internet connection, especially when uploading a large number of photos or videos. Also, be mindful of your Google Drive storage capacity, as high-quality photos may not count against your storage limit, but original-quality photos and videos will.
By following these steps, you can easily save your photos on Google Photos, providing a safe and accessible way to store and enjoy your memories.
Also Read: How to Get Your Website on Google First Page
Email your news TIPS to Editor@Kahawatungu.com — this is our only official communication channel

