


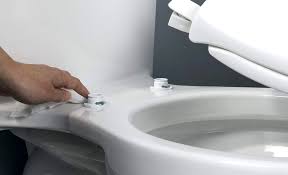
Installing a toilet seat is a simple home improvement task that requires minimal tools and time. Whether you’re replacing a broken seat or upgrading to a new style, you can easily do it yourself. All you need is a screwdriver and possibly an adjustable wrench. Most toilet seats fit standard toilets, so finding the right replacement is usually straightforward. Here is how to install a toilet seat.
- Remove the Old Toilet Seat
Start by lifting the seat and locating the two bolts at the back, near the tank. These bolts usually have plastic covers that snap open.
- Use a flathead screwdriver to hold the top of the bolt
- From underneath, loosen the nut with your hand or a wrench
Once both bolts are free, lift the old seat off the toilet bowl.
- Clean the Area Around the Holes
Before installing the new seat, clean the area thoroughly. Remove any dirt, rust, or residue left behind from the old seat. This helps the new seat sit properly and prevents any wobbling. - Position the New Seat
Take the new toilet seat and align the holes with those on the toilet bowl. Make sure the seat is facing the right way and sits evenly on the rim. - Insert the Bolts
Insert the new bolts through the holes in the seat and the bowl. Most modern toilet seats come with plastic bolts and nuts that are easy to install by hand. Push the bolts through and begin tightening the nuts underneath. - Tighten the Nuts
Hold the bolt in place from the top with a screwdriver while you twist the nuts from below. Tighten them enough so the seat doesn’t move, but avoid over-tightening, especially if the bolts are plastic, as they can crack. - Test the Seat for Stability
Once both bolts are tight, lower the seat and lid to check for alignment. Sit on the seat gently to test its stability. If it shifts, tighten the bolts a bit more. - Snap On the Covers
If your new seat has plastic caps, snap them over the bolt heads for a clean, finished look.
Also Read: How To Handle Objections In Sales

Email your news TIPS to Editor@Kahawatungu.com — this is our only official communication channel
