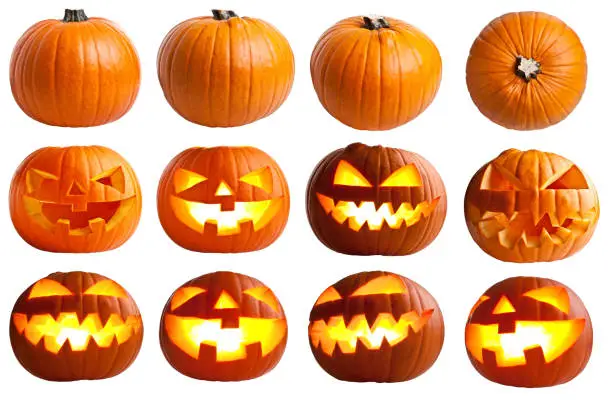
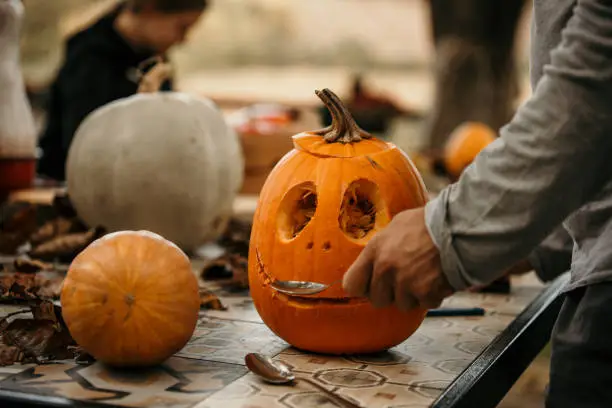
Pumpkin carving is a Halloween tradition that combines artistry, creativity, and a touch of spooky fun. Whether you’re looking for simple designs to try with kids or intricate carvings to impress neighbors and guests, there are endless ways to transform a pumpkin into a Halloween masterpiece. Below is a collection of creative pumpkin carving ideas, ranging from easy to advanced, that can elevate your Halloween decor this season.
-
Classic Jack-o’-Lantern with a Twist
- Start with the classic triangle eyes and a jagged mouth but add flair by giving your jack-o’-lantern extra details like eyebrows, scars, or a crooked smile.
- Try carving a pumpkin with multiple faces, each showing a different expression—happy, scary, sad, and surprised. This adds a fun twist to the traditional jack-o’-lantern.
- Experiment with placing the light source at different angles inside the pumpkin to create dynamic shadows that give your design extra depth.
-
Wordy Pumpkins: Carve Out Messages
- Instead of a face, carve Halloween-themed words like “BOO,” “EEK,” or “RIP” into the pumpkin. For added impact, place multiple pumpkins with different words side by side to spell out phrases like “Happy Halloween” or “Trick or Treat.”
- Personalize your Halloween display by carving your family name or house number onto a pumpkin. This idea is perfect for adding a welcoming touch to your porch.
-
Animal-Themed Carvings
- Create the iconic Halloween cat by carving pointy ears and a long, curled tail. Add whiskers by carving thin slits on the pumpkin face or using black pipe cleaners.
- Carve out a large bat shape across the pumpkin and let its wings spread to the edges. This design can be elevated by adding a second smaller bat for a layered look.
- Carve large, round eyes with a smaller circle inside to create the owl’s gaze. Add a beak and feather details for an enchanting owl-themed design.

-
Stencil-Inspired Designs
- Use pre-made stencils of ghosts, witches, and skeletons for a professional look without needing advanced skills. Download free printable stencils or purchase intricate ones online.
- Look for stencils featuring autumn leaves, acorns, or branches. These are ideal for a nature-inspired fall theme that works beyond Halloween.
- Some stencils are designed to create likenesses of well-known characters or celebrities. This is a fun way to bring pop culture into your Halloween decor.
-
Shadow Silhouette Pumpkins
- Carve simple silhouette shapes, such as a haunted house, witch on a broomstick, or eerie forest trees. Place the pumpkin close to a wall so the light casts a haunting shadow.
- For a layered look, use different-sized pumpkins, each with a unique silhouette, and arrange them at various distances from the light source to create depth.
-
Drilled Pattern Pumpkins
- Using a drill, create evenly spaced holes for a simple and elegant design that glows beautifully. You can vary the drill bit size to create different-sized dots, adding depth to the design.
- Use the drill to create geometric shapes like stars, hearts, or triangles. Arrange these patterns symmetrically or asymmetrically for a modern aesthetic.
- For a celestial touch, carve the pattern of a constellation such as Orion or the Big Dipper. This design is unique and perfect for stargazers and astronomy fans.

-
3D Carving Ideas
- Use a carving knife to scrape off the outer layer of the pumpkin’s flesh without piercing through. This creates a layered effect that allows light to filter through the thin areas, adding dimension to the design.
- Instead of carving traditional cutouts, scrape away parts of the pumpkin skin to create “wrapped” sections for a mummy look. Complete it by adding eyes made of small LEDs or marbles.
- For a spooky twist, carve an exaggerated monster mouth with big teeth and add fake eyeballs on top of the pumpkin. This makes for a fun, kid-friendly design.
-
Pumpkin Carving for Beginners
- If you’re new to pumpkin carving, start with easy shapes like ghosts, stars, or crescent moons. These are quick to carve and still create a magical Halloween vibe.
- Use mini pumpkins to practice carving simpler designs like hearts, stars, or polka dots. Place them as a set to enhance your Halloween decor.
- Begin with simple eyes and mouths, then add fun touches with accessories like hats, glasses, or fake mustaches to make them look playful and unique.
-
Glow-in-the-Dark Paint Accents
- After carving, apply glow-in-the-dark paint around the edges of the cutouts. This enhances the design at night, making the pumpkin shine even brighter.
- For those who want to avoid messy carving, try painting glow-in-the-dark designs like spider webs, bats, or polka dots directly on the pumpkin.
- Combine carved designs with glow paint for a multidimensional look. The glow will accentuate certain areas, giving it an added eerie effect.

-
Mixed Media and Pumpkin Accessories
- Use materials like pipe cleaners, googly eyes, buttons, and feathers to enhance your pumpkin carvings. For example, add googly eyes to a traditional jack-o’-lantern to make it look more playful.
- Stack smaller pumpkins on top of a large one to create a character with a head and body. You can use toothpicks or skewers to hold them in place.
- Create a diorama effect by carving a large opening and arranging figurines or small decorations inside, like skeletons or haunted houses. This transforms your pumpkin into a Halloween storybook scene.
Tips
- Look for pumpkins with smooth surfaces and flat bottoms so they sit upright. Smaller pumpkins are great for simpler designs, while larger ones work well for intricate carvings.
- A set of pumpkin carving tools, including different-sized saws and a scraper, can make carving easier and safer than using a kitchen knife.
- To prevent your carved pumpkin from wilting, spray the cut surfaces with a mixture of water and bleach or rub them with petroleum jelly. This can help slow down the decay process and keep your design fresh.
- For illumination, consider using LED lights or battery-operated candles. They’re safer than real candles and last longer, ensuring your pumpkin glows brightly for days.
Also Read: How To Draw Barbie: A Step-by-Step Guide
Email your news TIPS to Editor@Kahawatungu.com — this is our only official communication channel

