
Close Menu
    Facebook X (Twitter) Instagram
    Facebook X (Twitter) Instagram
    KahawatunguKahawatungu
    Button
    • NEWS
    • BUSINESS
    • KNOW YOUR CELEBRITY
    • POLITICS
    • TECHNOLOGY
    • SPORTS
    • HOW-TO
    • WORLD NEWS
    KahawatunguKahawatungu
    HOW-TO

    How To Make A Cube

    Damaris GatwiriBy Damaris GatwiriFebruary 7, 2025No Comments2 Mins Read
    Facebook Twitter WhatsApp Telegram Email
    How To Make A Cube
    Share
    Facebook Twitter WhatsApp Telegram Pinterest Email Copy Link

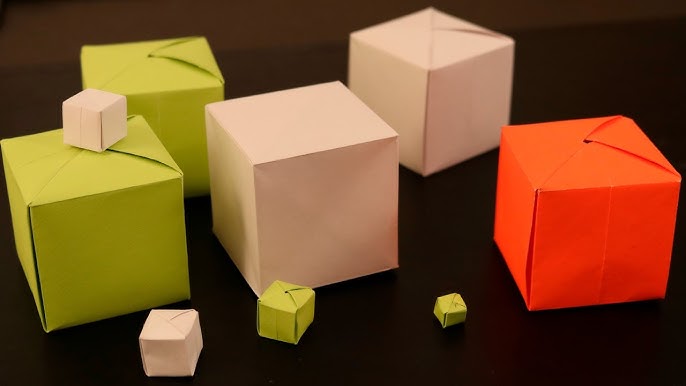
    A cube is a three-dimensional geometric shape with six equal square faces. Whether you need one for a school project, crafting, or as a basic 3D model, making a cube can be simple and fun. You can create a cube using paper, cardboard, or even wood, depending on your purpose. Below is a guide on how to make a cube using paper or cardstock, as it is the easiest method.

    Materials Needed

    • A sheet of paper or cardstock
    • A ruler
    • A pencil
    • Scissors
    • Glue or tape

    Instructions

    1. Draw the Cube Template
      Using a ruler and pencil, draw six equal squares on your paper. The squares should be arranged in a cross shape, with four squares forming a straight vertical line and two squares attached to the sides of the second square from the top. This will form the cube’s net.
    2. Add Tabs for Gluing
      Draw small flaps along the edges of some squares. These flaps will help you glue or tape the cube together. Ensure the tabs are about 1 cm wide and positioned along the sides where the cube will be joined.
    3. Cut Out the Cube Template
      Carefully cut along the outer lines of the template, including the tabs. Avoid cutting inside the squares or across the tabs.
    4. Fold Along the Lines
      Using the ruler to guide you, fold along each edge of the squares. This will help shape the cube. Also, fold the glue tabs inward.
    5. Assemble the Cube
      Apply glue or tape to the tabs and carefully attach the edges of the squares together. Hold each side for a few seconds to ensure it sticks properly.
    6. Let It Dry and Finish
      If using glue, allow the cube to dry completely before handling it. Once dry, check that all sides are securely attached.

    Also Read: How To Install Downlights

    Stay connected via Google News
    Follow us for the latest news updates and guides.
    Add as preferred source on Google

    Email your news TIPS to Editor@Kahawatungu.com — this is our only official communication channel

    Follow on Facebook Follow on X (Twitter)
    Share. Facebook Twitter WhatsApp LinkedIn Telegram Email
    Damaris Gatwiri

    Damaris Gatwiri is a digital journalist, driven by a profound passion for technology, health, and fashion.

    Related Posts

    How to Remove Safe Mode on a Phone

    October 23, 2026

    How to Remove an Email Account From a Phone

    October 23, 2026

    How to Remove Page Breaks in Word

    October 23, 2026

    Comments are closed.

    Latest Posts

    Bayern Munich manager Vincent Kompany taken to hospital after collapsing at training

    October 24, 2026

    Seven missing after Eastleigh building collapse as 67 construction workers accounted For

    October 24, 2026

    Kenya’s Ebola death toll rises to two as third patient succumbs

    October 23, 2026

    Former insurance firm officer charged over Sh89.5 million fraud

    October 23, 2026

    Trump DOJ sues to block Alaska US Senate results if Republican incumbent loses

    October 23, 2026

    Lawyer in court over Bill seeking to stop livestreaming of election results

    October 23, 2026

    Equity staff charged with attempting to hack bank’s computer system, released on bail

    October 23, 2026

    Melania Trump brokers truce for Ukraine city ‘on brink of disaster’, White House says

    October 23, 2026
    Facebook X (Twitter) Instagram Pinterest
    © 2026 Kahawatungu.com. Designed by Okii.

    Type above and press Enter to search. Press Esc to cancel.